Chicken Biryani is a dish that holds a special place in the hearts (and stomachs!) of food lovers across the globe. Originating from the Indian subcontinent, this aromatic and flavorful one-pot dish has transcended borders and evolved into countless regional variations. At its heart, chicken biryani is a celebration of fragrant spices, tender chicken, and perfectly cooked basmati rice layered together in a harmonious symphony of taste.
In this blog, we’ll take you through a step-by-step guide to making the perfect chicken biryani. Whether you’re an experienced cook or a beginner, this recipe will help you recreate the magic of restaurant-style biryani in your own kitchen.
Ingredients for Chicken Biryani
For the Chicken Marinade:
- 1 kg chicken (bone-in or boneless, as per preference)
- 1 cup yogurt (curd)
- 2 tablespoons ginger-garlic paste
- 1 teaspoon turmeric powder
- 2 teaspoons red chili powder
- 1 teaspoon garam masala
- 1 teaspoon cumin powder
- Juice of 1 lemon
- Salt to taste
For the Rice:
- 3 cups basmati rice (soaked for 30 minutes)
- 6 cups water
- 4-5 green cardamom pods
- 3-4 cloves
- 1-inch cinnamon stick
- 1 bay leaf
- 1 teaspoon salt
- 1 teaspoon ghee (optional, for extra flavor)
For the Biryani Masala:
- 3 large onions, thinly sliced
- 2 medium tomatoes, finely chopped
- 4 green chilies, slit
- 1 cup fresh coriander leaves, chopped
- 1 cup fresh mint leaves, chopped
- 2 tablespoons biryani masala powder (store-bought or homemade)
- 1/2 teaspoon saffron strands soaked in 1/4 cup warm milk
- 3 tablespoons ghee or oil
Optional:
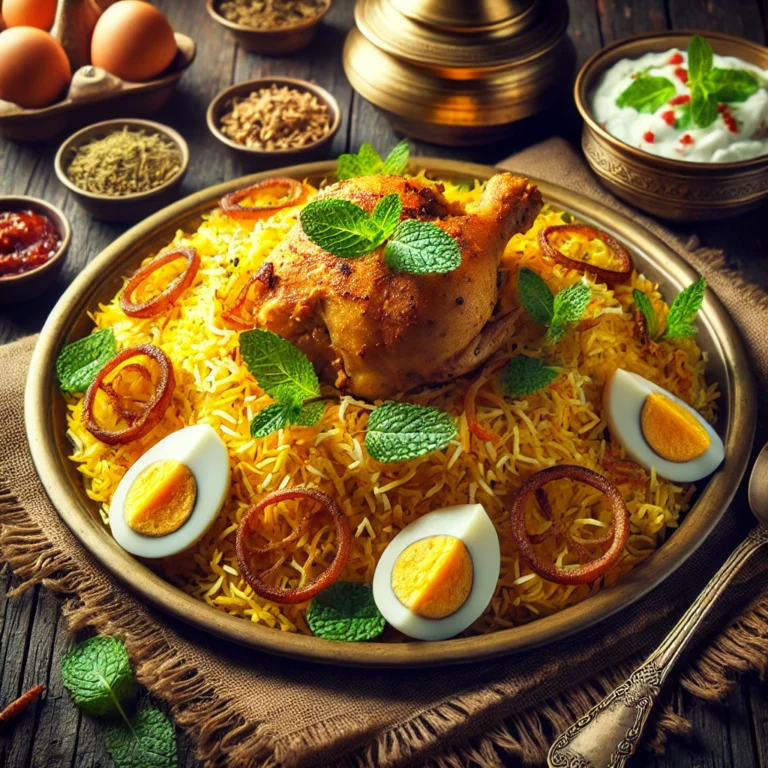
- Fried onions for garnishing
- Hard-boiled eggs (halved) as a topping
Step-by-Step Guide to Making Chicken Biryani
Step 1: Marinate the Chicken
- In a large mixing bowl, combine the chicken pieces with yogurt, ginger-garlic paste, turmeric, red chili powder, garam masala, cumin powder, lemon juice, and salt.
- Mix well to ensure the chicken is evenly coated with the spices.
- Cover the bowl with cling wrap and refrigerate for at least 1 hour, preferably overnight. This step tenderizes the chicken and infuses it with flavor.
Step 2: Prepare the Rice
- Wash the basmati rice under cold running water until the water runs clear. This removes excess starch and prevents the rice from sticking together.
- In a large pot, bring 6 cups of water to a boil. Add cardamom pods, cloves, cinnamon, bay leaf, salt, and ghee.
- Once the water is boiling, add the soaked rice and cook until it’s 70% done (the grains should still be slightly firm). Drain the rice and set it aside.
Step 3: Cook the Chicken Masala
- Heat ghee or oil in a heavy-bottomed pan or skillet. Add the sliced onions and sauté until they turn golden brown. This step is crucial for adding depth to the biryani’s flavor.
- Add the chopped tomatoes and green chilies. Cook until the tomatoes turn soft and the oil begins to separate.
- Add the marinated chicken to the pan and cook on medium heat until the chicken is almost done. Stir occasionally to prevent sticking.
- Add biryani masala powder and a handful of chopped mint and coriander leaves. Mix well and cook for another 5 minutes.
Step 4: Layer the Biryani
- In a large, heavy-bottomed pot or Dutch oven, spread a thin layer of ghee at the bottom to prevent sticking.
- Begin layering the biryani by spreading half of the partially cooked rice at the bottom.
- Add the cooked chicken masala on top, spreading it evenly.
- Add the remaining rice over the chicken layer.
- Drizzle the saffron milk on top, along with some chopped mint and coriander leaves. You can also add fried onions for an extra burst of flavor.
- Cover the pot with a tight-fitting lid. You can seal the edges with dough to lock in the steam.
Step 5: Dum Cooking (Steam Cooking)
- Place the pot on low heat and cook for 25-30 minutes. This process is known as “dum,” which allows the flavors to meld together beautifully.
- Alternatively, you can place the pot in a preheated oven at 180°C (350°F) for 20 minutes.
Step 6: Serve and Enjoy!
- Once cooked, let the biryani rest for 10 minutes before opening the lid. This allows the flavors to settle.
- Gently fluff the rice with a fork, being careful not to break the grains.
- Serve hot with raita, pickle, or a simple salad. Garnish with fried onions and boiled eggs, if desired.
Tips for Perfect Chicken Biryani
- Use Long-Grain Basmati Rice: The hallmark of a good biryani is fluffy, non-sticky rice. Choose high-quality basmati rice for the best results.
- Marination is Key: Allow the chicken to marinate for at least an hour. This enhances the flavor and ensures the meat stays tender.
- Don’t Overcook the Rice: Par-cook the rice to about 70% before layering. It will finish cooking during the dum process.
- Layering is Important: Proper layering ensures that the flavors are evenly distributed.
- Control the Heat: Cook on low heat during the dum process to prevent burning and to allow the flavors to meld.
A Brief History of Biryani
The origins of biryani are as rich and layered as the dish itself. Believed to have been brought to the Indian subcontinent by Persian travelers and traders, biryani evolved into numerous regional varieties, each with its own unique twist. Hyderabadi, Lucknowi (Awadhi), Kolkata, and Malabar are just a few of the famous biryani styles that have captured the hearts of food enthusiasts worldwide.
Why Homemade Biryani is the Best
While restaurant-style biryani is tempting, nothing beats the satisfaction of making it from scratch. Homemade biryani allows you to control the quality of ingredients, adjust the spice levels to suit your taste, and experiment with variations.
Variations of Chicken Biryani
- Hyderabadi Biryani: Known for its intense flavors and “kachchi” (raw) cooking method where raw chicken is layered with rice and cooked together.
- Lucknowi Biryani: A milder version with delicate flavors and aromatic saffron.
- Kolkata Biryani: Includes potatoes and boiled eggs, adding a unique twist.
- Malabar Biryani: Features coconut milk and ghee, offering a richer, creamier texture.
Conclusion
Chicken biryani is more than just a dish; it’s an experience. The combination of fragrant spices, tender chicken, and perfectly cooked rice makes it a timeless favorite for celebrations and family meals alike. Follow this step-by-step recipe, and you’ll be well on your way to creating a biryani masterpiece that will impress your loved ones.
Happy cooking and bon appétit!
